I have decided to not extend setup.zip as a domain. The pricing is just not something I am willing to pay out of pocket. So I hope it will not be used to exploit people. and security mitigations have been put in place in the meantime to avoid tools to render something like setup.zip as a clickable think.
Something I learned from HalvarFlake in 2019 that it can be quite painful to remember what conference one spoke in the past.
Giving a talk at a conference, event or appearing on a podcast is a big service for the community, who can learn from your experience. At the same time it is a testament to your impact and something to be proud of. It is cool to look back where you spoke 5 years ago and what topics you found relevant back then.
Such a list can be useful when trying to get a new job or to get more attention from hiring managers. It can serve to show your expertise in a specific field. Last but not least it can help future program committees in a paper review process to see your speaking abilities (if the review is not done blindly).
It also can prevent or reduce the risk of burnout. Seeing how much you spoke in the past gives you the ability to reflect the workload, additional workload added by preparing a talk which is usually forgotten when agreeing to speak. If you felt comfortable giving 5 talks a year, you might be well off giving 6. Agreeing on 15 however might be a big step up and should be done very carefully.
Since then I capture my speaking at a page of my page. I recommend you do the same every 6 months.
The following error is rather annoying when dealing with Google Cloud functions.
ERROR: (gcloud.functions.deploy) OperationError: code=3, message=Function failed on loading user code. This is likely due to a bug in the user code. Error message: Code in file main.py can't be loaded.
Detailed stack trace:
Traceback (most recent call last):
  File "/env/local/lib/python3.7/site-packages/google/cloud/functions/worker_v2.py", line 359, in check_or_load_user_function
    _function_handler.load_user_function()
  File "/env/local/lib/python3.7/site-packages/google/cloud/functions/worker_v2.py", line 236, in load_user_function
    spec.loader.exec_module(main_module)
  File "<frozen importlib._bootstrap_external>", line 728, in exec_module
  File "<frozen importlib._bootstrap>", line 219, in _call_with_frames_removed
  File "/user_code/main.py", line 4, in <module>
    from google.cloud import secretmanager
ImportError: cannot import name 'secretmanager' from 'google.cloud' (unknown location)
The solution to that is to place a requirements.txt in your project with:
google-cloud-secret-manager==2.0.0
Further read: https://dev.to/googlecloud/using-secrets-in-google-cloud-functions-5aem
People are usually excited to play with the tools they have around, so was I. I am doing sports with different Garmin sport devices for multiple years and always was curious what you could find if you apply forensics tools on the device. So it might be interesting to forensicate your Garmin Watch, Bike computer or other Garmin devices. This blog post will go over some opportunities and how to do it. And what I learned from it.
If you are curious why you might use something like that, have a look at a recent entry from dcrainmaker.
Take an image
The first thing is always can we take a forensic image. For this the watch needs to be detected as a Mass Storage device (it is recommended to mount as read only!). For my testing I used a GARMIN Forerunner 45S. Once you attach it via USB, it will show up:
$ diskutil list
/dev/disk2 (external, physical):
#: TYPE NAME SIZE IDENTIFIER
0: GARMIN *10.3 MB disk2
$ diskutil unmountDisk /dev/disk2
Unmount of all volumes on disk2 was successful
We can now take a DD image (E01 would be even better, but for this articles purpose, I did not bother to do that, if you find yourself in a situation, where your evidence might be used in court etc, please use a write-blocker and have the image taking process tested and verified!):
$ sudo dd if=/dev/disk2 of=garmin_backup.img.dd bs=512
20066+0 records in
20066+0 records out
10273792 bytes transferred in 23.258457 secs (441723 bytes/sec)
Now we have a dd image of the watch and can continue investigating it without messing with the device itself. It is safe to unplug the device now.
First attempt is to just run the image using Plaso (Plaso Langar Að Safna Öllu) known for “super timeline all the things” to get a timeline. The easiest way is to use the docker version of Plaso:
docker run -v ./scripts/garmin/:/data log2timeline/plaso log2timeline --partition all /data/garmin_backup.img.dd.plaso /data/garmin_backup.img.dd
The resulting plaso file can then be e.g. uploaded to your Timesketch instance directly and will mostly show file related attributes / events, but still a good starting point.
Import Plaso file in Timesketch
The interesting files are in the Activities folder. But besides that we can see certain “expected” file related timestamps that Plaso can extract. To learn more about Timesketch, visit https://timesketch.org
So let’s continue and try to find out more about the activity fit file.
Using the mentioned above python library we can parse the file. What we are interested in is for sure the timestamp of the entry.
Depending on the event frequency there might be a lot of files in there.
After a bit I was successful putting every message in a pandas Dataframe, and also noticed that it might be interesting to keep the device metadata as well.
Here is my code (I ran it in a colab notebook):
def process_file(fitfile,filename):
  # Iterate over all messages of type "record"
  # (other types include "device_info", "file_creator", "event", etc)
  all_entries = []
  headers = []
  device_sting = ""
  for device in fitfile.get_messages("device_info"):
    #print(device.get_values())
    #device_sting = " ".join((device_sting, str(device.get_values())))
    all_entries.append(device.get_values())

  for record in fitfile.get_messages("record"):
      recordt_row = []
      entry = record.get_values()
      #if 'device_info' not in entry.keys():
      #  entry['device_info'] = device_sting
      recordt_row.append(record.get_values())
      #entry.append("device_info")
      #print(entry)
      # Records can contain multiple pieces of data (ex: timestamp, latitude, longitude, etc)
      all_entries.append(entry)

  df = pd.DataFrame(all_entries)
  if 'timestamp' in df:
    df['datetime'] = pd.to_datetime(df['timestamp'])
  else:
    return
  return df
With this you return a pandas dataframe that then can be easily imported into Timesketch for further analysis.
Watch it in Timesketch
For testing purposes I used the following .FIT file: https://github.com/dtcooper/python-fitparse/blob/master/tests/files/2019-02-17-062644-ELEMNT-297E-195-0.fit
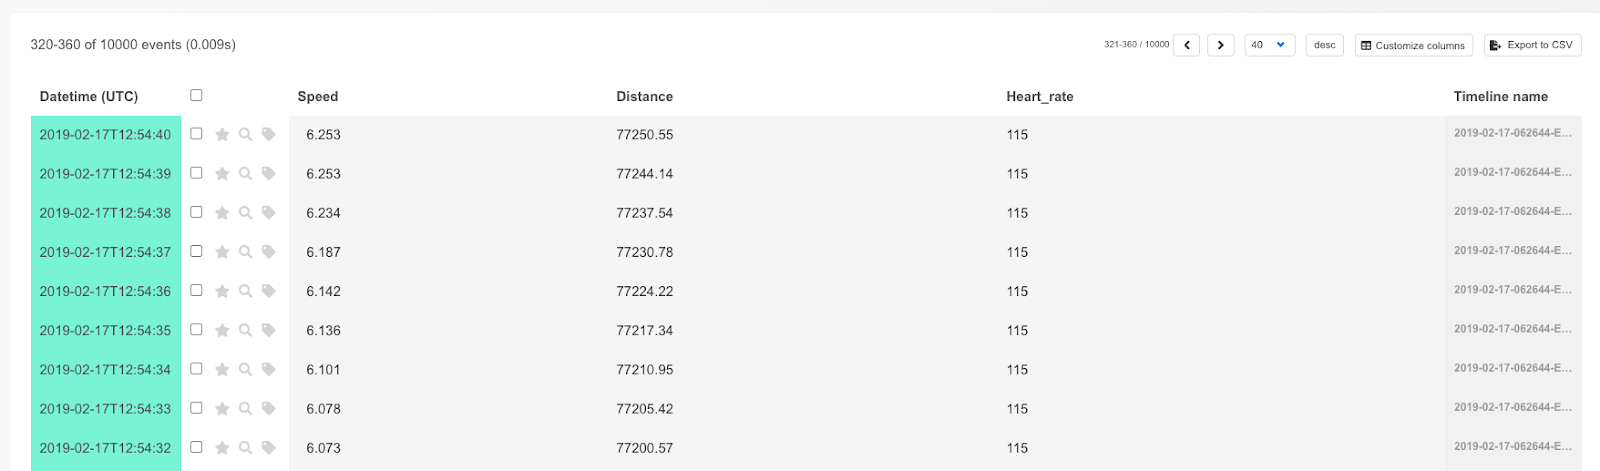
And in Timesketch it looks like:
You also can look for Serial number of the Garmin Device:
Pretty cool!
Analyse your data with pandas
Once the data is in Timesketch, you can use sketch.explore to get the data back. With the following command:
Return all entries with GPS coordinates. With some extra packages:
!pip install -q folium
import folium
And the following code:
cur_df['lat'] = cur_df['position_lat'] /100000000 # hacky way, for some reason the coordinates where stored weird
cur_df['lon'] = cur_df['position_long']/100000000
cur_df.info()
cur_df

map1 = folium.Map(location=(49.850,	8.2462), zoom_start=3)
for index,row in df_new.iterrows():
  # Add the geocoded locations to the map
  folium.Marker(location=(row['lat'],row['lon']),popup='bla').add_to(map1)

display(map1)
You can actually plot a map with the coordinates:
And many more is possible. Hope you liked this article. The notebook is also available on Github. The idea is here was not to examine everything in detail, but give a foundation for further work on how to get the data in and get started.
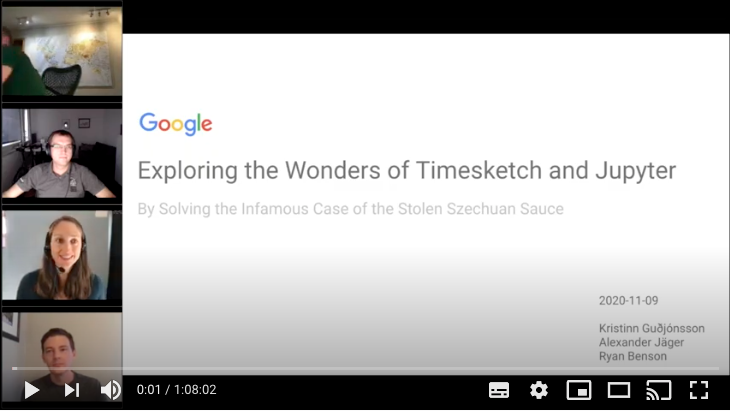
Together with two team members, I had the opportunity to give a webinar to 100+ virtual attendees covering a digital forensics scenario with Colab / Jupyter and Timesketch.
It was really fun and I hope people are able to get some ideas. The webinar did not cover all things we put into the notebook shared on the Timesketch Github repository, so even if you watched the webinar, it is still worth to check it out.
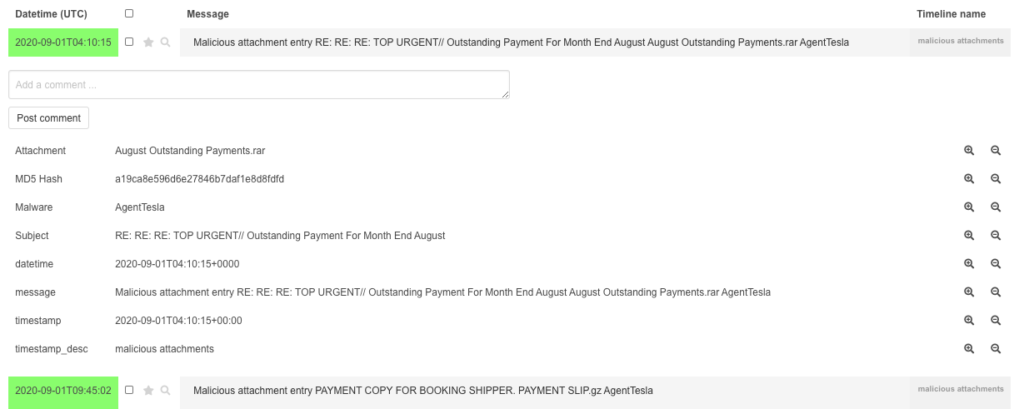
The great cocaman has released a new useful script to check IMAP accounts attachments for MalwareBazaar hits. He wrote about the script on his blog. The script generates a csv with timestamps. So for sure I wanted to check how easy it would be to get that data to Timesketch.
The date values however are really weird, so that is going to be fun as the sample file I got from cocaman had various formats, time zones and others in the column.
First step we open the csv in Google Sheets (my fav. csv parser) and do not let it parse any dates etc…
I removed one line where the date was “None” but of course spending a little more time could also solve that.
Download the csv again as csv.
Now lets move to colab for further stuff.
The process is pretty straightforward. Install google-colab and import the csv.
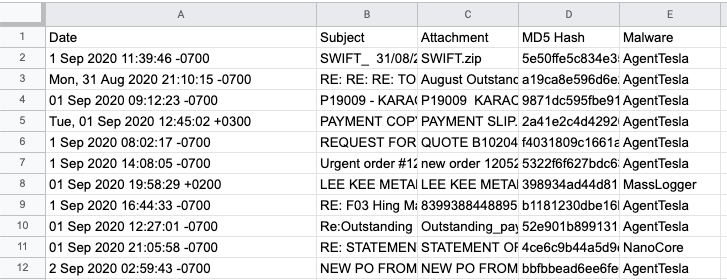
After formatting the date to be parsed and in a Timesketchable format, we can upload the pandas dataframe. The pandas dataframe looks like the following:
Plus I would recommend afterwards to register your old username with a different mail address to protect from people trying to claim repository links you previously owned.
Timesketch, the open-source timeline collaboration tool recently upgraded the UI and that is why I am writing a new blog post to show the new UI by processing a E01 image via plaso.
First, install plaso and timesketch (in my case I used both via docker images as it is the easiest way to get it running.
As a scenario, I am using the image file provided by NIST. Which has been covered in many many blog posts already.
Processing via plaso
First, run the plaso docker container where the image file is stored.
docker run -v /evidence/:/data log2timeline/plaso log2timeline /data/evidences.plaso /data/4DellLatitudeCPi.E01
That will run for a while.
plaso - log2timeline version 20191203

Source path		: /data/4DellLatitudeCPi.E01
Source type		: storage media image
Processing time		: 00:23:38

Tasks:          Queued  Processing      Merging         Abandoned       Total
                0       0               0               0               12210

Identifier      PID     Status          Memory          Sources         Events          File
Main            7       completed       293.9 MiB       12210 (0)       168913 (0)
Worker_00       14      idle            288.7 MiB       5804 (0)        82139 (0)       TSK:/WINDOWS/system32/config/systemprofile/Start Menu/Programs/Accessories/Accessibility/Utility Manager.lnk
Worker_01       16      idle            268.9 MiB       6405 (0)        86774 (0)       TSK:/WINDOWS/system32/config/systemprofile/Start Menu/Programs/Accessories/Entertainment/desktop.ini

Processing completed.

Number of warnings generated while extracting events: 2.

Use pinfo to inspect warnings in more detail.
docker-compose up -d
export CONTAINER_ID="$(sudo docker container list -f name=development_timesketch -q)"
Import data
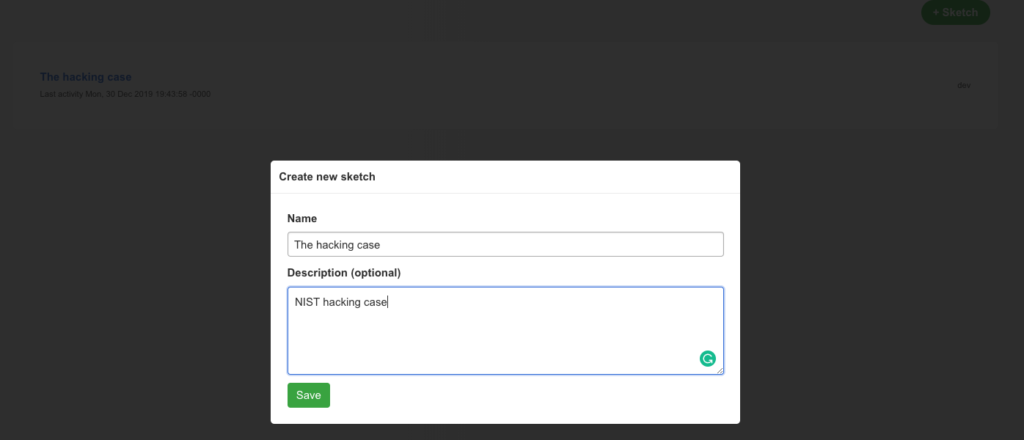
Create a case via Web UI
Create the Case in Timesketch
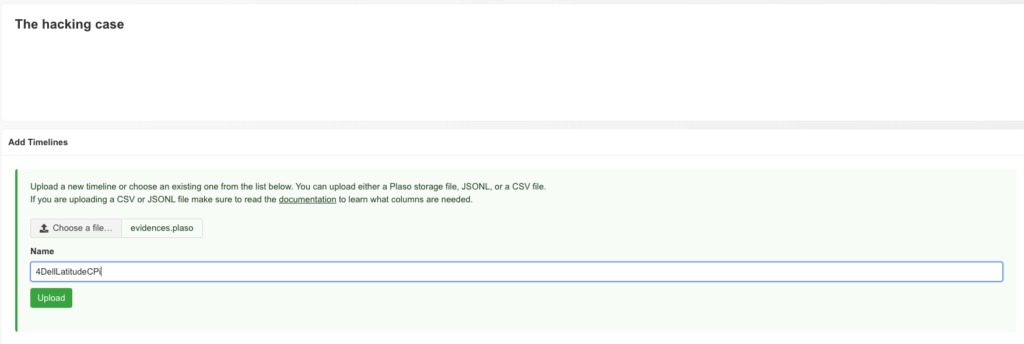
I decided to upload the plaso file via Web-UI.
Timesketch data upload
Also in the Web UI, process feedback is visible
Timesketch data uploading
Now data is being indexed
Timesketch data indexing
This will trigger an entry in the debug output
[2019-12-30 19:22:38,018: INFO/MainProcess] Received task: timesketch.lib.tasks.run_plaso[2ab18910-e2e1-4b0d-977c-948605b335dd]
[2019-12-30 19:22:38,088: INFO/ForkPoolWorker-1] Index timeline [evidences] to index [d3cf025c5c94498e8300190d92e483ae] (source: plaso)
[2019-12-30 19:24:13,148: INFO/ForkPoolWorker-1] Task timesketch.lib.tasks.run_plaso[2ab18910-e2e1-4b0d-977c-948605b335dd] succeeded in 95.0877274190002s: 'd3cf025c5c94498e8300190d92e483ae'
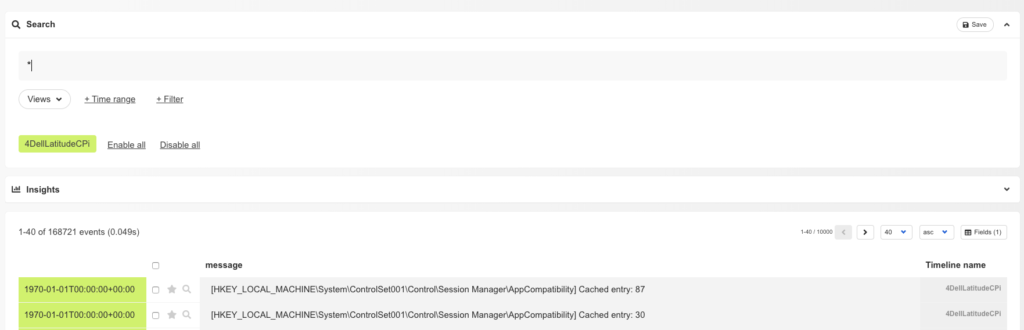
Data exploring
After indexing, the data is ready to be explored via Timesketch
Analyzers
One of the new cool features is Analyzers. These analyzers run predefined queries on the data of a timeline do some actions like
add tags to matching events (e.g. phishy-domains)
add new fields to an event (e.g. browser search would add a field called „search_string„
Answering questions
To showcase the power of Timesketch, let’s try to solve some of the questions of NIST that came along with the image
What operating system was used on the computer?
This is rather easy as plaso already has a parser for that, so searching for „Windows NT*CurrentVersion“ will do the job
What is the timezone settings?
Again, plaso is already parsing that, searching for „timezone“ will show „ActiveTimeBias: 300 Bias: 360 DaylightBias: -60 DaylightName: Central Daylight Time StandardBias: 0 StandardName: Central Standard Time„
Seit ich vor ca. 1,5 Jahren mein Surly Orge gekauft habe, störte mich im Grunde nur eine Sache: der fehlende Fahrradständer. An vielen Orten ist es ohne Probleme machbar, das Rad anzulehnen, aber eben nicht überall.
Irgendwann bin ich dann auf dieses Video von Craig Meyer auf Youtube gestoßen:
Dort listet er folgende Dinge auf, die man benötigt:
capscrews+nuts 2x M6, 30mm (not 40mm!), stainless
DIN 912 I-6Kt Zyl-Schr 8.8 vz. M 6×30 (engl.: Metric socket cap, Stainless steel 18-8 (A-2), 6mm x 1.0mm x 30mm. Each)
DIN 982 Stoppmutter Kl.8 vz. Polyamidklemmteil, hohe Form M 6 (engl: Metric hex lock nuts nylon insert, Stainless steel 18-8, 6mm x 1.0mm. Each)
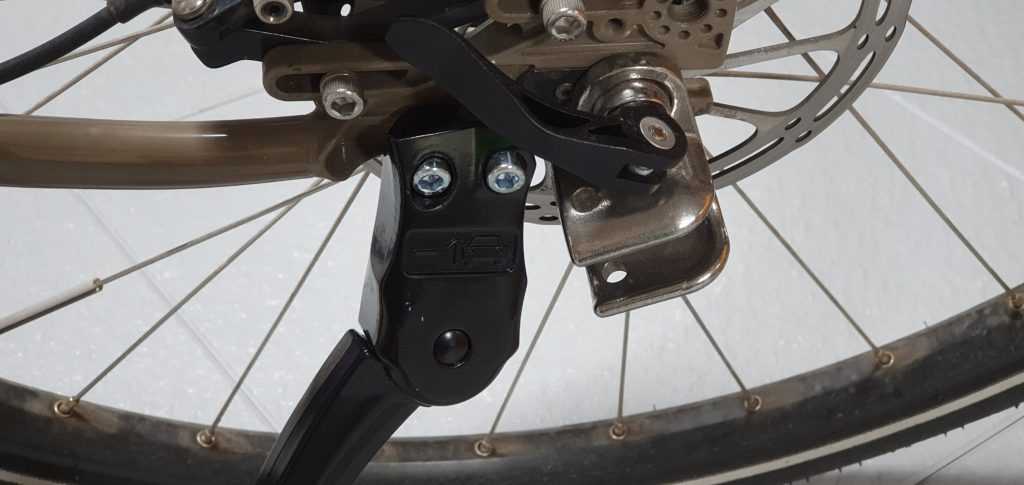
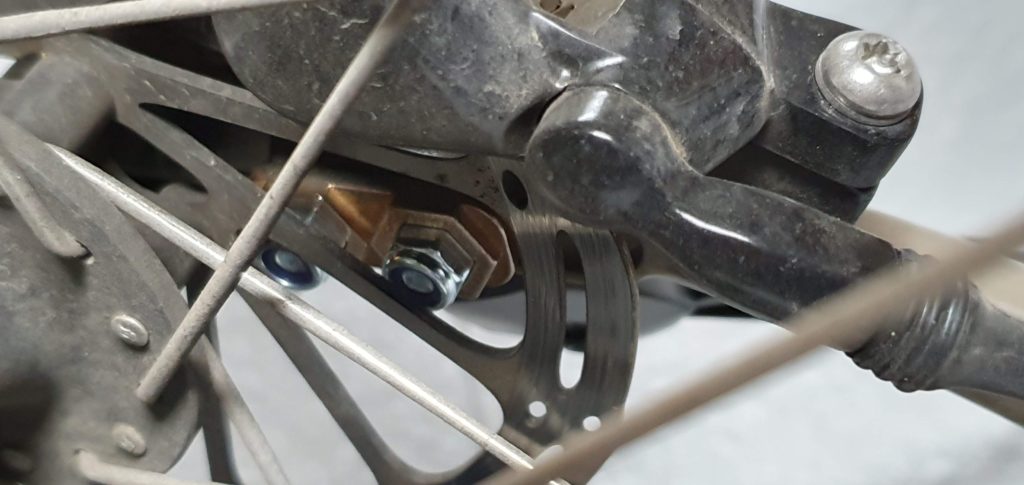
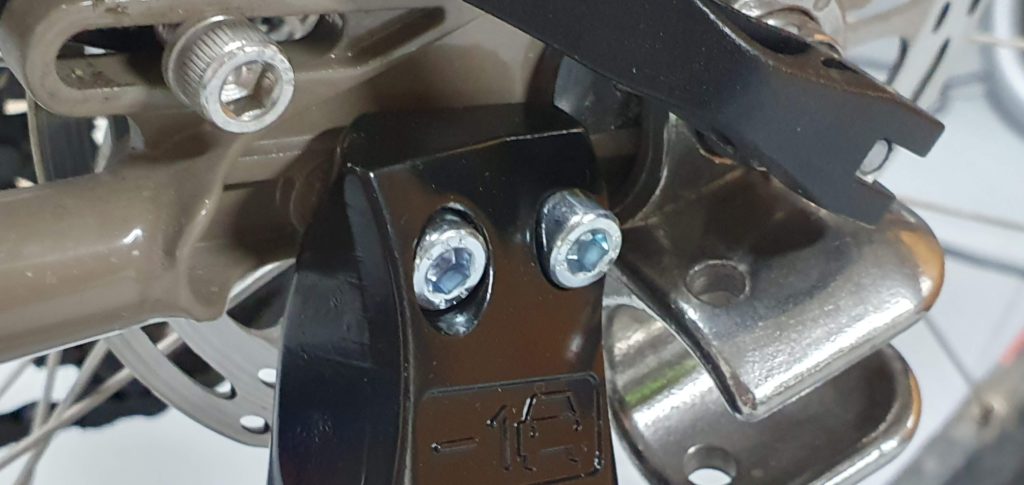
Die Montage an sich dauert dann keine 30 Minuten, ich habe nicht mal das Hinterrad ausgebaut und trotz Scheibenbremse mit etwas Fingerspitzengefühl machbar.
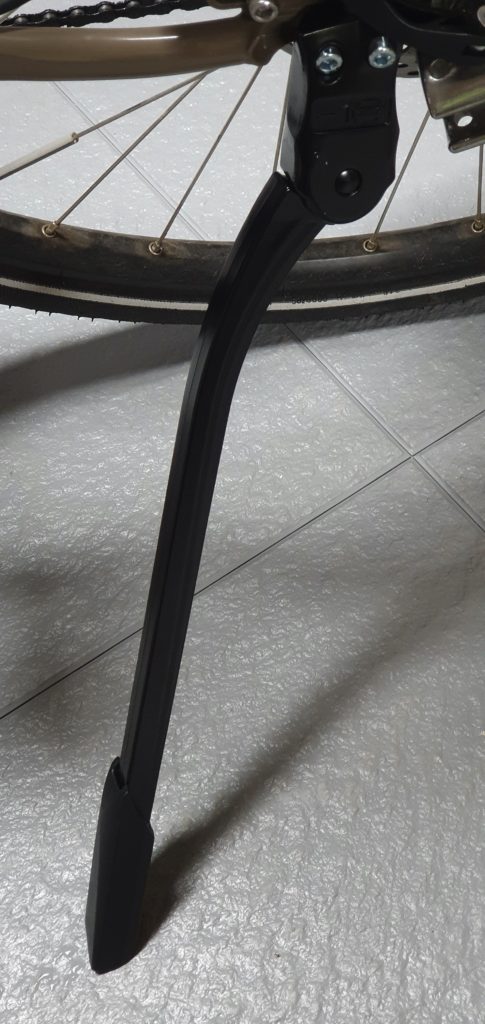
Und so sieht das Ergebnis aus:
Surly Ogre FahrradständerSurly Orge Kickstand Verschraubung kein Problem mit ScheibenbremseSurly Ogre Kickstand AnsichtSurly Ogre Kickstand ausgeklappt
Einzige Herausforderung ist noch die Gelenkschale für einen Thule Chariot, die jetzt so angebracht ist, dass sie wohl nicht nutzbar ist. To be continued…