Recommendation: curate a list of speaking engagements

Something I learned from HalvarFlake in 2019 that it can be quite painful to remember what conference one spoke in the past.

Giving a talk at a conference, event or appearing on a podcast is a big service for the community, who can learn from your experience. At the same time it is a testament to your impact and something to be proud of. It is cool to look back where you spoke 5 years ago and what topics you found relevant back then.

Such a list can be useful when trying to get a new job or to get more attention from hiring managers. It can serve to show your expertise in a specific field. Last but not least it can help future program committees in a paper review process to see your speaking abilities (if the review is not done blindly).

It also can prevent or reduce the risk of burnout. Seeing how much you spoke in the past gives you the ability to reflect the workload, additional workload added by preparing a talk which is usually forgotten when agreeing to speak. If you felt comfortable giving 5 talks a year, you might be well off giving 6. Agreeing on 15 however might be a big step up and should be done very carefully.

Since then I capture my speaking at a page of my page. I recommend you do the same every 6 months.

Items I recommend to capture:

  • Date of talk / podcast
  • Conference title
  • Talk title
  • Link to slides if available
  • Link to a recording if available
  • Link to blogpost from others covering your talk

#FIRSTCTI22 FIRST CTI Event Berlin 2022 Review

It is November 9th 2022 and I had a few days to digest and think about the FIRST CTI event taking place in Berlin from 2022-11-01 to 2022-11-03.

You can find more direct feedback and impressions on Twitter with the hashtag #FIRSTCTI22 where I also shared stuff.

The program is published at https://www.first.org/events/symposium/berlin2022/program. So let’s dive into my thoughts.

To give some context, I participated in the first FIRST CTI, called FIRST Technical Colloquium on Threat Intelligence, hosted by Siemens in 2016. Back then the topic was very new (remember STIX/CybOX, Mantis). But some topics were relevant already back then like how to operationalize Threat Intelligence and how to evaluate information. It was great then and I was excited to see what has changed since then.

Training

As I only arrived on Tuesday, I had to skip the trainings, but I was able to talk to participants with mixed impression, which is no surprise given the different roles / background of the participants (more on that later) so I hope many of them provide feedback to the event team so they can extract the right learnings on which training is best suited for the audience.

Wednesday

I had the honor to moderate the Wednesday, so while I was able to hear all talks, I had to also focus on logistics, take time and have some questions ready for the speakers. To my surprise the audience did not take that much advantage of the fact that we were all in one room and asked very few questions. Maybe this is something which we need to re-learn after the pandemic?

I really liked the talk from James Chappell „Ten Years of Cyber Threat Intelligence: Retrospectives“. It was a perfect entry and set the stage for the two following days and for sure James is a veteran in the field, so there were several observations that stuck with me.

Next up was another highlight for me: „Crossing the Cyber Sad Gap“ from Jake Nicastro. Jake went into the risk of our jobs and how it can affect the mental health and offered some points to take home and address in your team, very eye opening and I am sad that this talk will not be made available to the public.

Another thing I want to highlight is the mixture at the event between practitioners and academia, Clemens Sauerwein from the University of Innsbruck, Department of Computer Science, AT presented on stage and there were several delegates who were really interested in conversation with industry and public sector people.

Obviously I was nervous giving my own talk together with tomchop, but I think it went really well.

Overall Wednesday was a really pleasant mixture of topics.

Audience

Overall the audience was a little over 330 delegates. From conversations I would assume around 40 % with a DFIR background, 40 % from CTI related roles and 20 % either a mixture or something else, but I guess the organizers have better stats on this.

The size of the audience felt ideal for me as well. There were enough people to run into random people to start a conversation but it was not too large to get lost, I think sub 400 is ideal.

There were delegates from all kinds of regions, with a majority coming from Europe, which is not a surprise given the event location. To build a reputation I would like to see the event happen again in Berlin, if there is demand to have something similar in other regions like AMER or APAC, I would suggest building local forks vs. Rotating over the planet like FIRST does for the annual conference. That should also make it easier for the planning team to figure out logistics, but again is my personal opinion and there are also advantages for changing locations.

Length

Personally I prefer events under three days. Longer events make me tired and come with too much social toll for me. Two days still enable follow up and enough opportunities to have conversations going a little deeper then „hey my name is John Doe, I work at XYZ, nice to meet you“ and then never see that person again.

Thursday

Started with another excellent talk about the human aspect of our industry „Why Your Security Analysts Are Leaving and What You Can Do to Retain Them“ by Thomas Kinsella, I highly recommend this talk.

I skipped one talk that was pre-recorded and instead spent my time networking with delegates, as I hope to see the talk afterwards on YouTube instead.

It is always nice to see new tools announced at events, same here, when „ORKL: Building an Archive for Threat Intelligence History“ was covered by Robert Haist. Solid talk and I recommend checking out the project web page and reaching out to Robert if you want to help the project.

The rest of the talks were all solid but I do not want to bother you with all my thoughts, I have provided feedback to the events team and I recommend you doing the same (check your mails for the survey).

The program committee did an excellent job setting up a program that catered for technical and strategic folks. Kudos: @thomasschreck_ , @adulau , @asfakian, James Chappell and Dr. Morton Swimmer.

Dinner

An important aspect of such events for me is to meet with old friends but also make new connections and introduce new people to the community. This time I tried to execute something I learned from Kate.

I made (or asked someone to make one) reservation in a restaurant nearby for 6-8 people, asked 2-4 people I already know and want to see again and added people I wanted to meet for a long time and or folks who asked to be introduced.

The result: a great combination of nice food, excellent group sizes to have different topics to talk about but not too large that it would go nowhere or someone would feel lost (at least I hope).

The absolute highlight for me was going to C-Base, if you have never heard about it, make sure to check it out, I will not spoil it here. Thanks Y.W. For your hospitality my friend.

Wish

If I had one wish for the future of that event, I would hope to have a more diverse audience and speakers. We as the community need to push more and improve.

Disclaimer

I have not been involved in the planning of the event other than setting a draft budget in November / December 2021 as part of the normal FIRST budgeting process. And above is purely my personal opinion on things.

Photocredit: Kamil Bojarski
Practical Doomsday: A User’s Guide to the End of the World

I have posted about this book a couple of times on Twitter before I realized I should just write down my thoughts.

TLDR: The book of Michael Zalwski is worth a read. It does not over hype the topic and does not try to fuel fear but bring attention to topics that are realistic to prepare a plan for.

The book starts with an introduction to risk, goes into setting boundaries to fictional scenarios and goes over some realistic cases that are more likely to happen.

Part II then goes into practical tips, especially by starting with a “rainy-day find”. While that is not possible for everyone, every following topic might be even harder to achieve. The section about “Getting in shape” greatly reminds me of the movie Zombieland rule #1 “#1: Cardio – When the virus struck, for obvious reasons, the first ones to go were the fatties.”.

Because this is not the first book about the topic, the third part, while not completely new, I would still consider it a good collection of achievable things one can do and should consider and follows an order of importance, starting with water.

The last part “Active self-defense” was the least interesting for me, but again, the author put enough disclaimer to it that there might be ways to avoid situations where you e.g. would need a firearm.

You can tell that the author has not only spent considerable time researching the topic but also applied various techniques in real life. If you only want to read one book and have already read and implemented the guidelines governments usually publish to their citizens to be prepared for emergencies, this book is good from a content perspective as well as easy to read and digest and implement.

Recommendation: If you are going to buy the book, maybe buy the hardcover, you do not want your disaster plan to be dependent on an electronic device, do you?

(The link above is an Amazon partner link)

You can also read a preview chapter at: https://lcamtuf.coredump.cx/prep/preview

API of the month: MISP

MISP is a very well known tool in the infosec community that enables individuals and teams to work and share indicators and other case relevant information.

The MISP API comes for free with every MISP installation of the free and open source software, so if you want to try it out, go for it. There are various install guides for MISP.

Once your MISP instance is up and running, you can head over to the MISP API documentation.

Search

Among all endpoints I did use the Search endpoint the most. This endpoint can be used to search all your MISP data. You can either just pass a string and search everything, or you filter by dedicates types. The query can be as complicated as you want it to be. Be careful with just value searches, depending on your data size, the requests might take a while to complete.

Get events

Another very useful thing after your searched is then pull the events that matched your search. This can be helpful to provide more context to analysts who started the search.

PyMisp

When writing about the MISP API, it is important to mention pyMISP, the Python library to access the MISP REST API. It is maintained by the same people behind MISP, so it is kind of a reference implementation of the API and is very easy to use.

Target audience

The target audience for the MISP API is researchers, students, DFIR professionals and everyone who has a need to store and query structured data around events.

More

Want to find more Security APIs? Go and visit my repository: https://github.com/jaegeral/security-apis

API of the month: api.first.org

Description

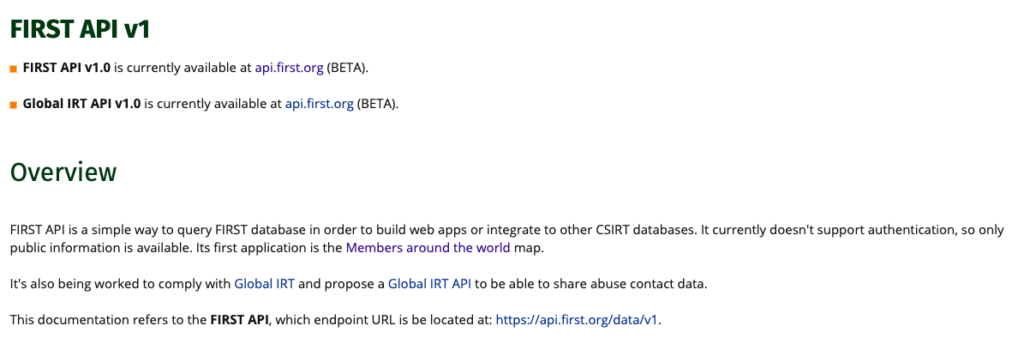
The Forum of Incident Response and Security teams (FIRST) offers an API to a subset of their database exposing teams.

„The Teams public information (available at http://www.first.org/members/teams) is available for querying using the method/data model /teams. This is the available endpoint for this data source:“

FIRST API screenshot

Pricing

The API is free and comes at no charge.

Signing up for the

Example 1

As an example, I have a script that can be a subroutine of an abuse handling process where the input is the name of the organisation an IP belongs to (based on Whois) the script is tasked to find a suitable responsible party who can deal with abuse handling.

Example 2

Second example, the input is a country, that might be revealed by using whois data for a particular IP, triaging the source to a specific country. The lookup should return a suitable national incident response team to assist in abuse handling.

Target audience

  • Incident responders who want to automate notification or lookup of peer teams
  • abuse handlers to lookup responsible CERT / CSIRTs or national Incident Response teams

Let’s talk about time – in a different blog

I wrote a blogpost, but in a different blog that I however wanted to link to. It is a blog that is maintained by a bunch of open source digital forensics incident response people some of which are my current team mates.

The blogpost is about Time. More specific on some general ideas and concepts around time. It then goes on to explain how time is relevant in IT and why it is important in digital forensics. It also contains some recommendations that everyone can (and should) apply.

Here is a except of the goal of the blog post:

Goal
This article explains the importance and challenges of time in digital forensics and incident response. You will learn how time is handled in various open source tools and get practical tips on managing time in your environment.

Are you curious: go over to: https://osdfir.blogspot.com/2021/06/lets-talk-about-time.html

ImportError: cannot import name ’secretmanager‘ from ‚google.cloud‘ (unknown location)

The following error is rather annoying when dealing with Google Cloud functions.

ERROR: (gcloud.functions.deploy) OperationError: code=3, message=Function failed on loading user code. This is likely due to a bug in the user code. Error message: Code in file main.py can't be loaded.
Detailed stack trace:
Traceback (most recent call last):
  File "/env/local/lib/python3.7/site-packages/google/cloud/functions/worker_v2.py", line 359, in check_or_load_user_function
    _function_handler.load_user_function()
  File "/env/local/lib/python3.7/site-packages/google/cloud/functions/worker_v2.py", line 236, in load_user_function
    spec.loader.exec_module(main_module)
  File "<frozen importlib._bootstrap_external>", line 728, in exec_module
  File "<frozen importlib._bootstrap>", line 219, in _call_with_frames_removed
  File "/user_code/main.py", line 4, in <module>
    from google.cloud import secretmanager
ImportError: cannot import name 'secretmanager' from 'google.cloud' (unknown location)

The solution to that is to place a requirements.txt in your project with:

google-cloud-secret-manager==2.0.0

Further read: https://dev.to/googlecloud/using-secrets-in-google-cloud-functions-5aem

Garmin .Fit file Forensics

People are usually excited to play with the tools they have around, so was I. I am doing sports with different Garmin sport devices for multiple years and always was curious what you could find if you apply forensics tools on the device. So it might be interesting to forensicate your Garmin Watch, Bike computer or other Garmin devices. This blog post will go over some opportunities and how to do it. And what I learned from it.

If you are curious why you might use something like that, have a look at a recent entry from dcrainmaker.

Take an image

The first thing is always can we take a forensic image. For this the watch needs to be detected as a Mass Storage device (it is recommended to mount as read only!). For my testing I used a GARMIN Forerunner 45S. Once you attach it via USB, it will show up:

$ diskutil list
/dev/disk2 (external, physical):
#: TYPE NAME SIZE IDENTIFIER
0: GARMIN *10.3 MB disk2
$ diskutil unmountDisk /dev/disk2
Unmount of all volumes on disk2 was successful

We can now take a DD image (E01 would be even better, but for this articles purpose, I did not bother to do that, if you find yourself in a situation, where your evidence might be used in court etc, please use a write-blocker and have the image taking process tested and verified!):

$ sudo dd if=/dev/disk2 of=garmin_backup.img.dd bs=512
20066+0 records in
20066+0 records out
10273792 bytes transferred in 23.258457 secs (441723 bytes/sec)

Now we have a dd image of the watch and can continue investigating it without messing with the device itself. It is safe to unplug the device now.

The device I tested was a FAT16 file system. If you want to learn more about forensic image taking, have a look at https://www.cyberciti.biz/faq/how-to-create-disk-image-on-mac-os-x-with-dd-command/

Run Plaso on the file

First attempt is to just run the image using Plaso (Plaso Langar Að Safna Öllu) known for “super timeline all the things” to get a timeline. The easiest way is to use the docker version of Plaso:

docker run -v ./scripts/garmin/:/data log2timeline/plaso log2timeline --partition all /data/garmin_backup.img.dd.plaso /data/garmin_backup.img.dd

The resulting plaso file can then be e.g. uploaded to your Timesketch instance directly and will mostly show file related attributes / events, but still a good starting point.

Import Plaso file in Timesketch

The interesting files are in the Activities folder. But besides that we can see certain “expected” file related timestamps that Plaso can extract. To learn more about Timesketch, visit https://timesketch.org

So let’s continue and try to find out more about the activity fit file.

.fit file

File format

There is a great description of the file format available at https://www.pinns.co.uk/osm/fit-for-dummies.html so no need to further investigate at the moment.

How to parse .fit files

Fortunately, there is already a MIT licensed project on github: 

https://github.com/dtcooper/python-fitparse with a lot of different test files to play with.

Using the mentioned above python library we can parse the file. What we are interested in is for sure the timestamp of the entry. 

Depending on the event frequency there might be a lot of files in there.

After a bit I was successful putting every message in a pandas Dataframe, and also noticed that it might be interesting to keep the device metadata as well.

Here is my code (I ran it in a colab notebook):

def process_file(fitfile,filename):
  # Iterate over all messages of type "record"
  # (other types include "device_info", "file_creator", "event", etc)
  all_entries = []
  headers = []
  device_sting = ""
  for device in fitfile.get_messages("device_info"):
    #print(device.get_values())
    #device_sting = " ".join((device_sting, str(device.get_values())))
    all_entries.append(device.get_values())

  for record in fitfile.get_messages("record"):
      recordt_row = []
      entry = record.get_values()
      #if 'device_info' not in entry.keys():
      #  entry['device_info'] = device_sting
      recordt_row.append(record.get_values())
      #entry.append("device_info")
      #print(entry)
      # Records can contain multiple pieces of data (ex: timestamp, latitude, longitude, etc)
      all_entries.append(entry)

  df = pd.DataFrame(all_entries)
  if 'timestamp' in df:
    df['datetime'] = pd.to_datetime(df['timestamp'])
  else:
    return
  return df

With this you return a pandas dataframe that then can be easily imported into Timesketch for further analysis.

Watch it in Timesketch

For testing purposes I used the following .FIT file: https://github.com/dtcooper/python-fitparse/blob/master/tests/files/2019-02-17-062644-ELEMNT-297E-195-0.fit

And in Timesketch it looks like:

You also can look for Serial number of the Garmin Device:

Pretty cool!

Analyse your data with pandas

Once the data is in Timesketch, you can use sketch.explore to get the data back. With the following command:

sketch = ts_client.get_sketch(2)
cur_df = sketch.explore(
   'speed:*',
   as_pandas=True,
   return_fields='datetime,speed'
)

You can do some fun:

cur_df['speed'].plot(linewidth=0.5);

To analyse the speed of your files:

Or with:

sketch = ts_client.get_sketch(2)
cur_df = sketch.explore(
    'position_lat:*',
    as_pandas=True,
    return_fields='position_lat,position_long'
)

Return all entries with GPS coordinates. With some extra packages:

!pip install -q folium
import folium

And the following code:

cur_df['lat'] = cur_df['position_lat'] /100000000 # hacky way, for some reason the coordinates where stored weird
cur_df['lon'] = cur_df['position_long']/100000000
cur_df.info()
cur_df

map1 = folium.Map(location=(49.850,	8.2462), zoom_start=3)
for index,row in df_new.iterrows(): 
  # Add the geocoded locations to the map
  folium.Marker(location=(row['lat'],row['lon']),popup='bla').add_to(map1)

display(map1)

You can actually plot a map with the coordinates:

And many more is possible. Hope you liked this article. The notebook is also available on Github. The idea is here was not to examine everything in detail, but give a foundation for further work on how to get the data in and get started.

OSDFCon Webinar on Timesketch

Together with two team members, I had the opportunity to give a webinar to 100+ virtual attendees covering a digital forensics scenario with Colab / Jupyter and Timesketch.

It was really fun and I hope people are able to get some ideas. The webinar did not cover all things we put into the notebook shared on the Timesketch Github repository, so even if you watched the webinar, it is still worth to check it out.

Th scenario is outlined on dfirmadness.com.

malicious-attachment-analysis-script to Timesketch with colab jupyter

Malspam Analysis csv to Timesketch

The great cocaman has released a new useful script to check IMAP accounts attachments for MalwareBazaar hits. He wrote about the script on his blog. The script generates a csv with timestamps. So for sure I wanted to check how easy it would be to get that data to Timesketch.

You can find his script on github: https://github.com/cocaman/analysis_scripts

If you edit it with your credentials and run it, you will end up with a csv with the following headers:

Date,Subject,Attachment,MD5 Hash,Malware

The date values however are really weird, so that is going to be fun as the sample file I got from cocaman had various formats, time zones and others in the column.

First step we open the csv in Google Sheets (my fav. csv parser) and do not let it parse any dates etc…

I removed one line where the date was “None” but of course spending a little more time could also solve that.

Download the csv again as csv.

Now lets move to colab for further stuff.

The process is pretty straightforward. Install google-colab and import the csv.

After formatting the date to be parsed and in a Timesketchable format, we can upload the pandas dataframe. The pandas dataframe looks like the following:

The resulting notebook is available on github.

Finally our result in Timesketch looks like the following: