Found a vmdk file / image of a virtual server and want to investigate it? Most forensic tools work with image files (such as DD output or raw) and a small tool can help you to convert it:
Install qemu:
apt-get install qemu
qemu-img convert -p -O raw source.vmdk destination.raw

    (0.00/100%)
Als Fahrrad-Pendler hat man besondere Anforderungen an sein Gefährt. Beständigkeit, Geschwindigkeit, Alltagstauglichkeit, Sicherheit und Kosteneffiziens stehen im Vordergrund.
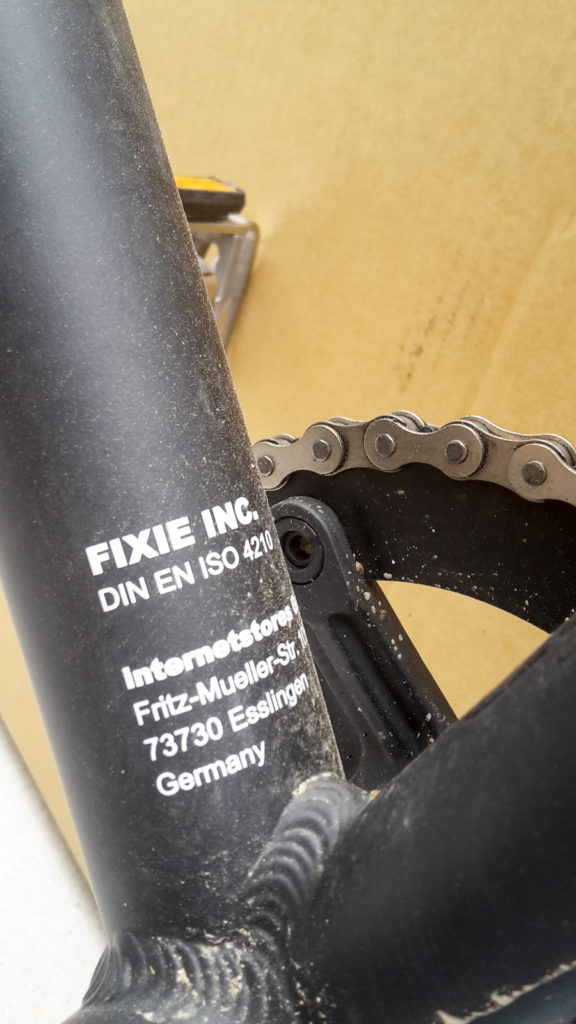
Die meisten Fahrräder erfüllen eines oder mehrere dieser Kriterien nicht oder nicht ausreichend. Durch Zufallen bin ich auf das FIXIE Inc. Floater twospeed RACE gestoßen. Fixie Inc. als Marke entstand laut deren Webseite im Jahr 2003 in Karlsruhe um 2012 an „internetstores“ verkauft zu werden um die Zielgruppe etwas anzupassen. Die Fahrräder sollen hauptsächlich für den Stadtgebrauch gemacht werden und einen gewissen LifeStyle vermitteln.
Optisch bauen die meisten Räder im Stile von fixed Gear bzw. Single-Speed Rädern. Auf die Vor- bzw. Nachteile von dieser Fahrradgattung soll hier nicht näher eingegangen werden.
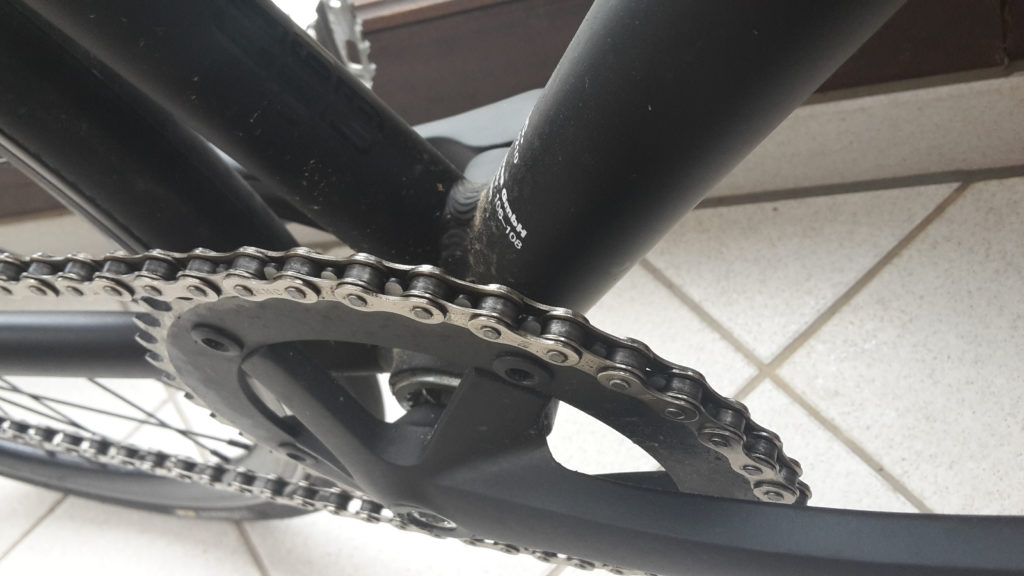
Eine kleine Ausnahme bietet das Fixie Inc. Floater twospeed, welches, wie der Name vermuten lässt, zwei Gänge bietet und damit ein deutlich anderes Fahrgefühl erzeugt.
Unboxing & Aufbau
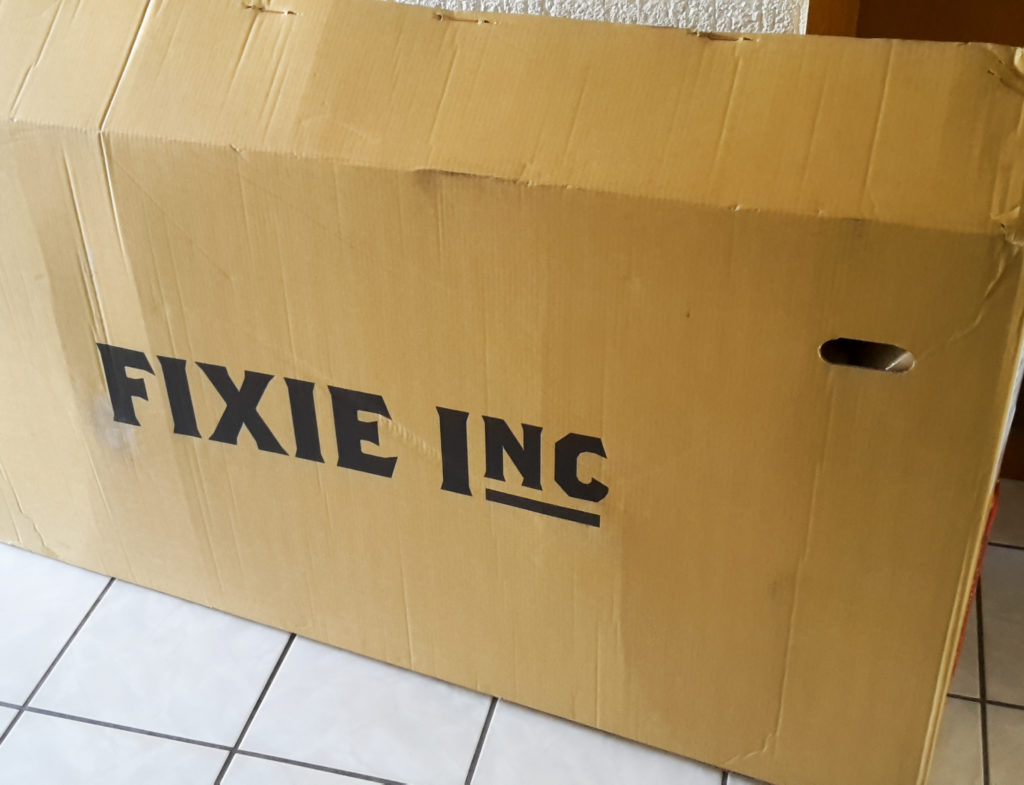
Das Fahrrad kommt in einem typischen Fahrrad Transport Karton, welcher ausreichend stabil ist und mit einem fetten Aufdruck „FIXIE Inc.“ direkt den Inhalt verrät.
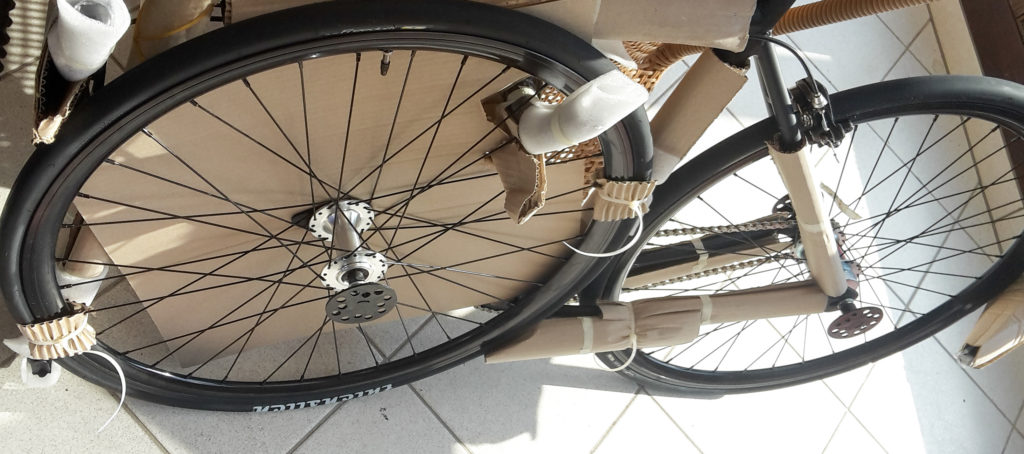
Im Inneren befindet sich das vormontierte Gerät mit allen benötigten Werkzeugen, Pedalen, Schrauben und einer Anleitung. Nachdem die Kartonagen, die zur Transportsicherung ausreichend am Fahrrad angebracht sind entfernt sind, kann man den Aufbbau in ca. einer halben Stunde bequem durchführen. Alle Schritte sind ausreichend in der Anleitung beschrieben und selbst für Anfänger kein Problem. Empfehlenswert ist die Verwendung eines Drehmoment-Schlüssels (nicht im lieferumfang) um die Klemmungen etc. korrekt anziehen zu können.
Um sicher im Straßenverkehr zu bestehen, habe ich mir das Fahrrad mit diversen Dingen nachgerüstet.
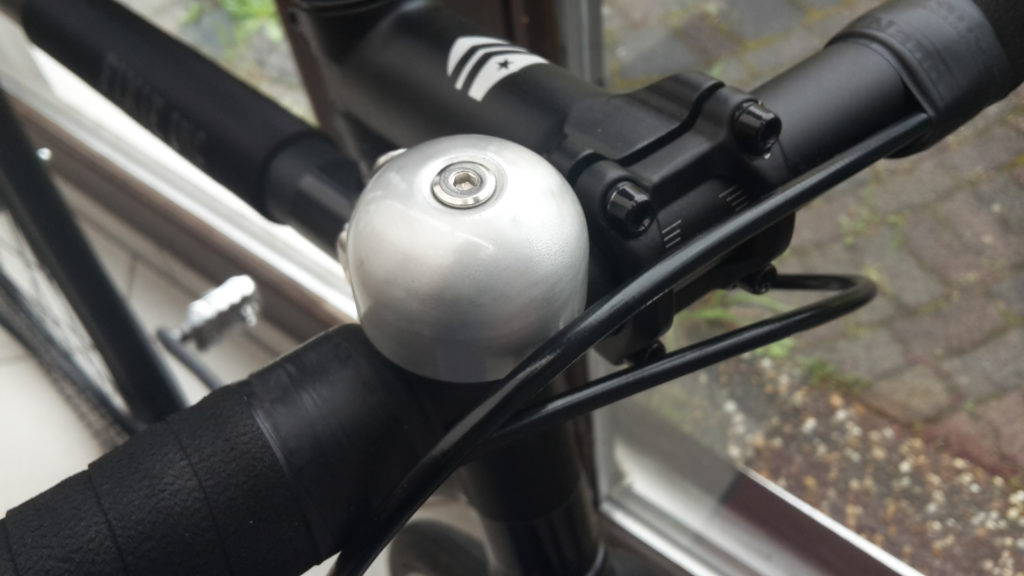
Klingel
Aufmerksamkeit, als Radler möchte man für Aufmerksamkeit sorgen, sei es beim Überholvorgang oder in risikoreichen Situationen, eine der wichtigsten Gegenstände ist dabei die Klingel. Ich habe mich für eine schlichte aber sehr laute XXX entschieden. Optisch vergleichbar mit der YYY, aber nicht ganz so teuer.
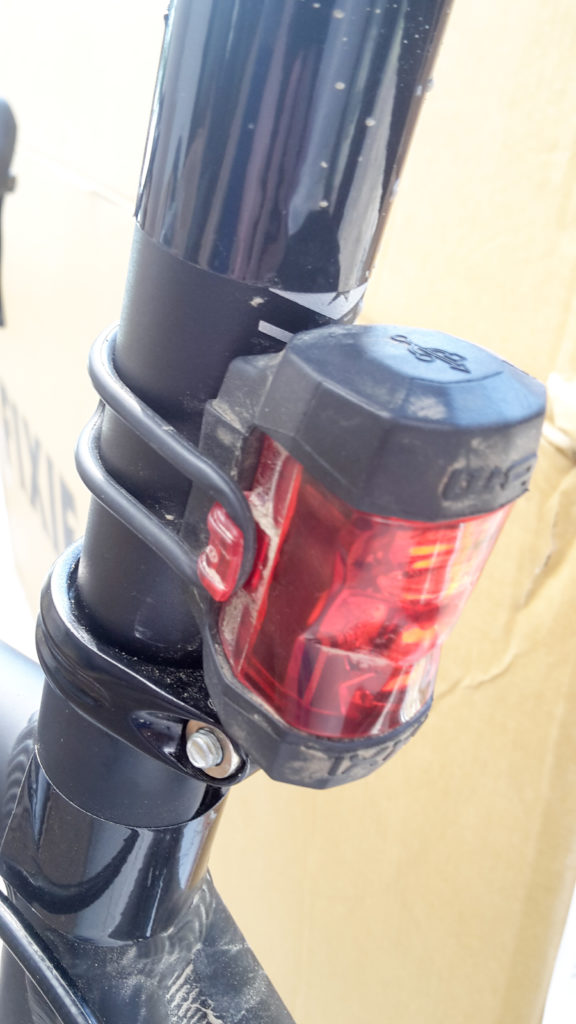
Lichtanlage
Licht ist nicht nur im Winter empfehlenswert, auch im Sommer kann man durch moderne LED Leuchtmittel gut auf sich aufmerksam machenund verhindert im Straßenverkehr übersehen zu werden. Aus meinem Fundus habe ich am Rad YYY verbaut, was mir in den Sommermonaten als ausreichend erscheint. Wer plant auch nach Sonnenuntergang unterwegs zu sein, sollte entsprechend mehr am Fahrrad verbauen.
Reflektoren
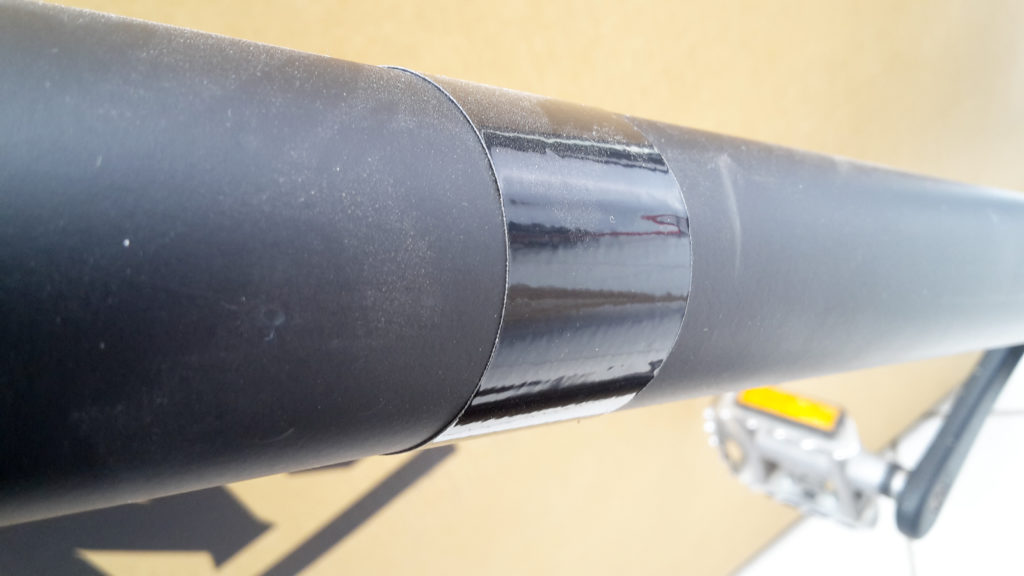
Neben aktiven Licht-Komponenten habe ich das Rad mit sehr vielen selbstklebenden und reflektierenden Folien beklebt. Das hat den Vorteil, dass tagsüber die schlichte Optik des Fahrrads nicht gestört wird. Bei Dämmerung oder in Dunkelheit können Autos und andere Teilnehmer im Straßenverkehr das Fahrrad aber deutlich besser sehen, da die Folien wirklich guten Dienst leisten.
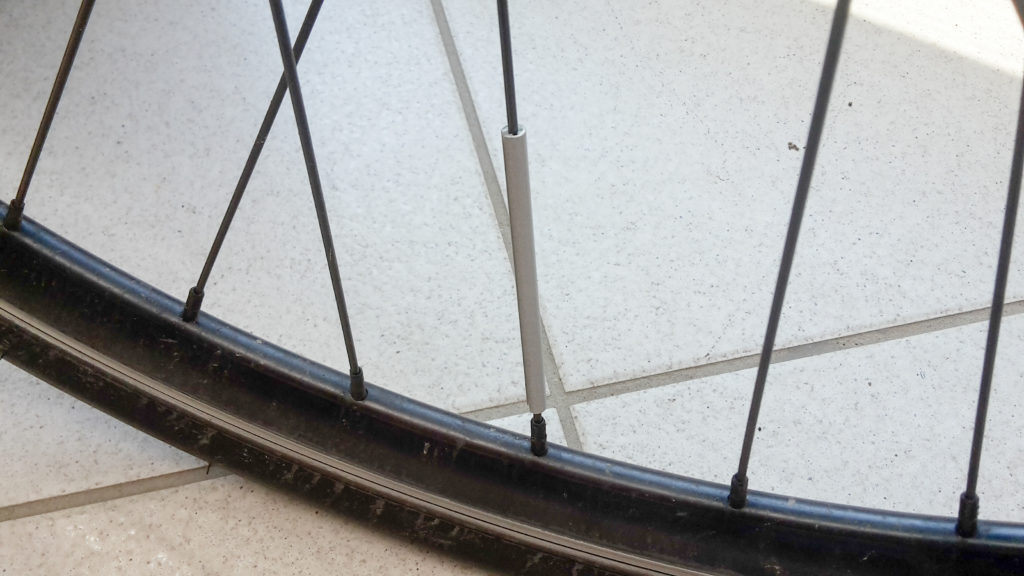
Obendrein sind in den Speichen noch Speichen-Reflektoren angebracht, selber Grund wie im vorigen Absatz beschrieben.
Verschleißteile
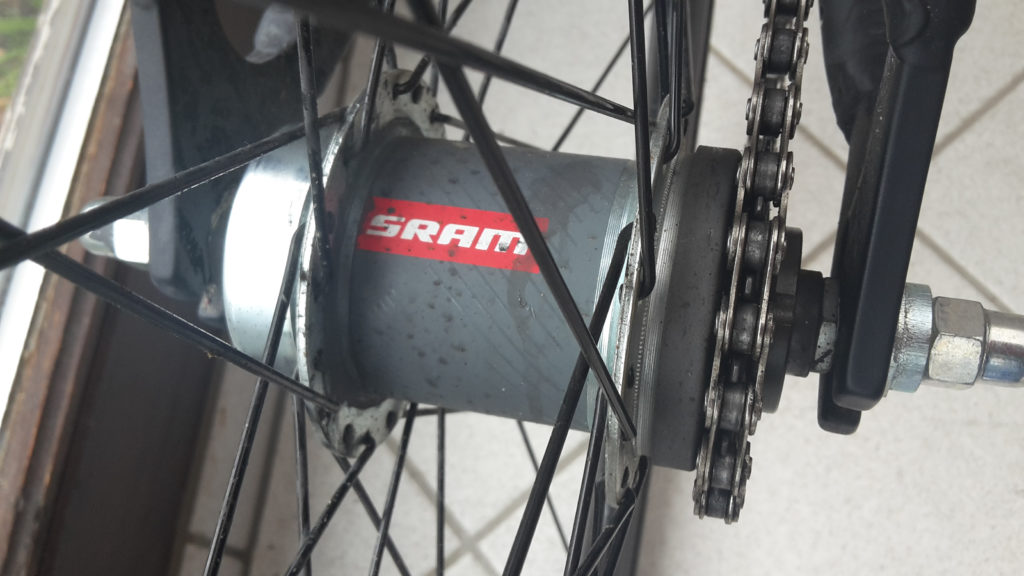
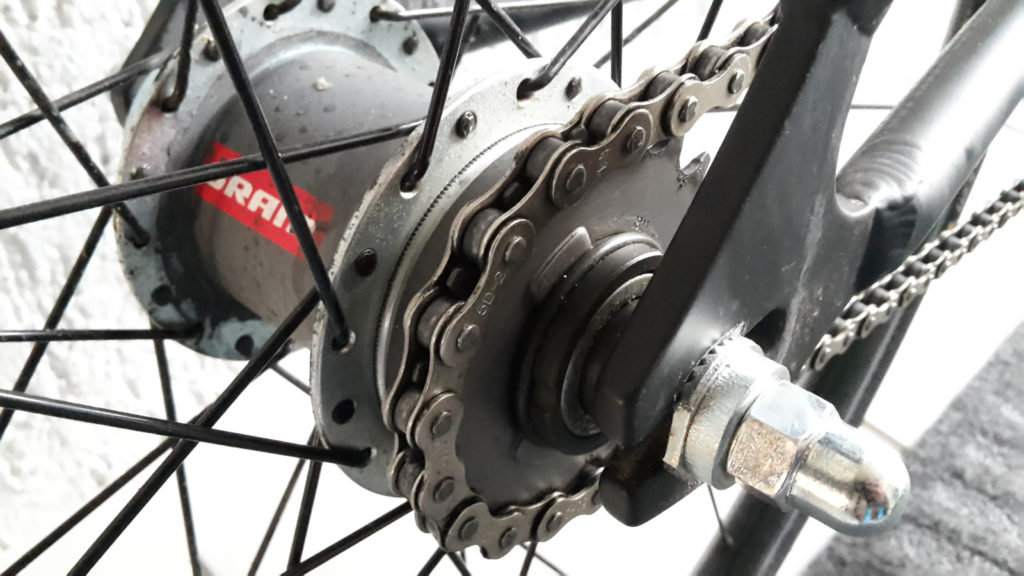
Narbe
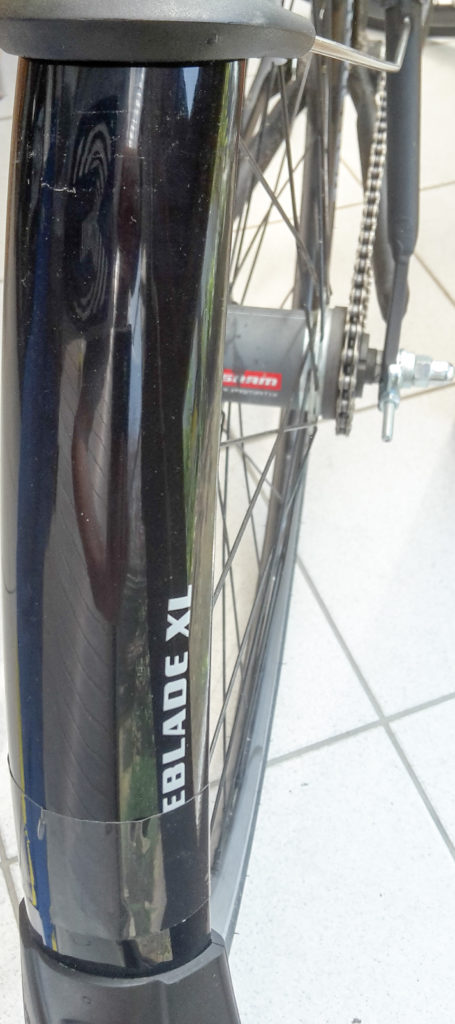
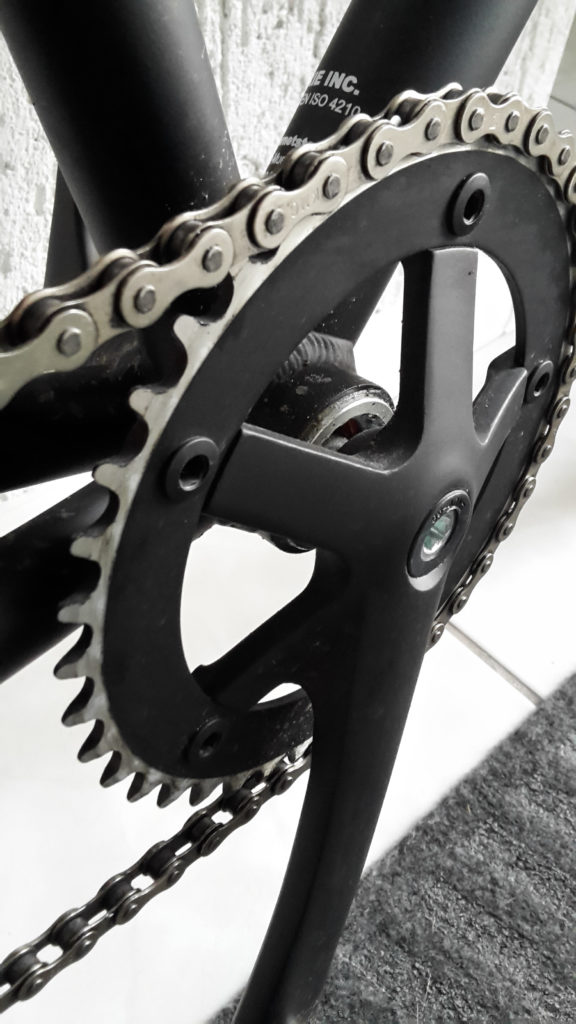
Herzstück des Rades und Grund der Nabensgebung ist die SRAM Automatix. Eine Zweigang Automatik Nabe. Sie bassiert auf mechanischer Fliehkraftkupplung und kann automatisch den Gang wechseln. Dies passiert abhängig von der Geschwindigkeit. Man startet im ersten Gang bis zu einer Geschwindigkeit von ca. 14-16 km/h und dann erfolg automatisch der Gangwechsel. Der zweite Gang liefert dann im Flachen ausreichend Entfaltung bis 35 und mehr km/h bei flachen Terrain.
Fahrgefühl
Am Anfang ist das automatische Schalten noch ungewohnt, nach kurzer Zeit gewöhnt man sich jedoch an den Luxus, nicht mehr über Gangwechsel nachdenken zu müssen und auch der Schaltzeitpunkt geht recht Schnell in Gewohnheit über.
Bei leichten Steigungen muss man mit dem dickeren Gang etwas drücken, was aber für die Form sicher nicht schlecht ist.
Probleme
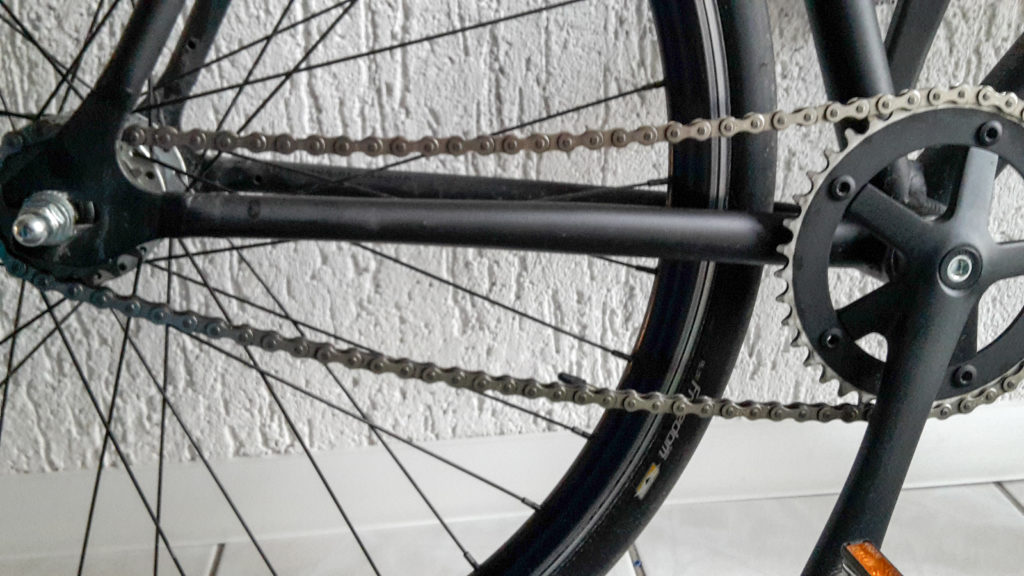
Ich hatte Probleme mit der Kettenspannung, wenn man das Hinterrad nicht mit entsprechender Spannung einbaut, hängt diese zum einen durch, die zu niedrige Kettenspannung ist somit optisch erkennbar, zum anderen kann es zum Herunterfallen der Kette in der Fahrt kommen, was dann recht unangenehm ist.
(Tipp: mit der Hand Zwischen Reifen und Rahmen paralell zur Kettenstrebe drücken, dann geht das Hinterrad automatisch nach hinten)
Hier ein Video für die richtige Kettenspannung:
Mein Rat
Anpassungen
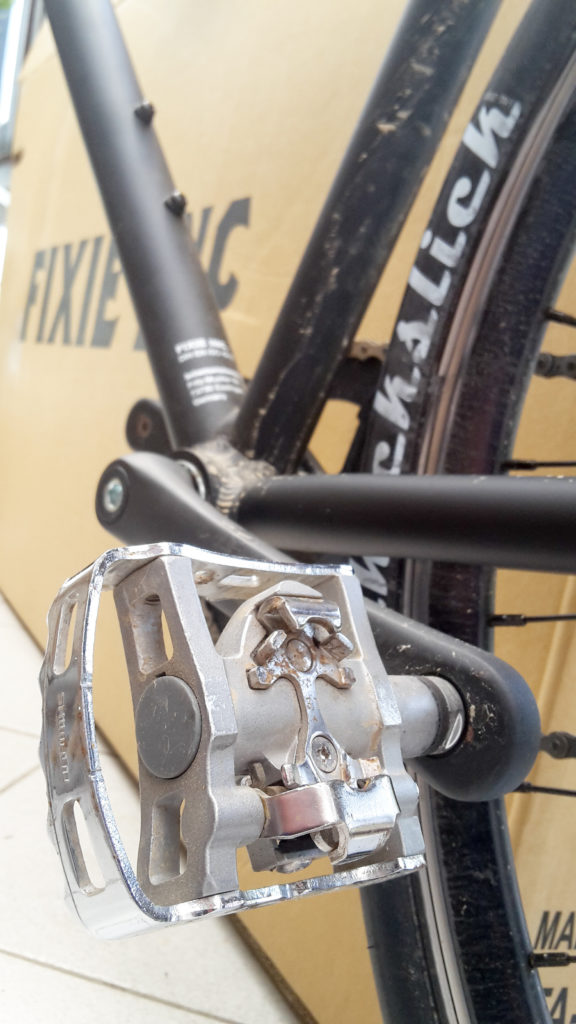
Pedale
Die mitgelieferten Pedale machen auf mich nicht den stabilsten Eindruck und da ich sowieso für den täglichen Arbeitsweg Schuhe mit SPD Adapter nutze, habe ich Kombi-Pedale ZZZ verbaut, diese sind mit normalen Straßenschuhen und SPD Schuhen nutzbar.
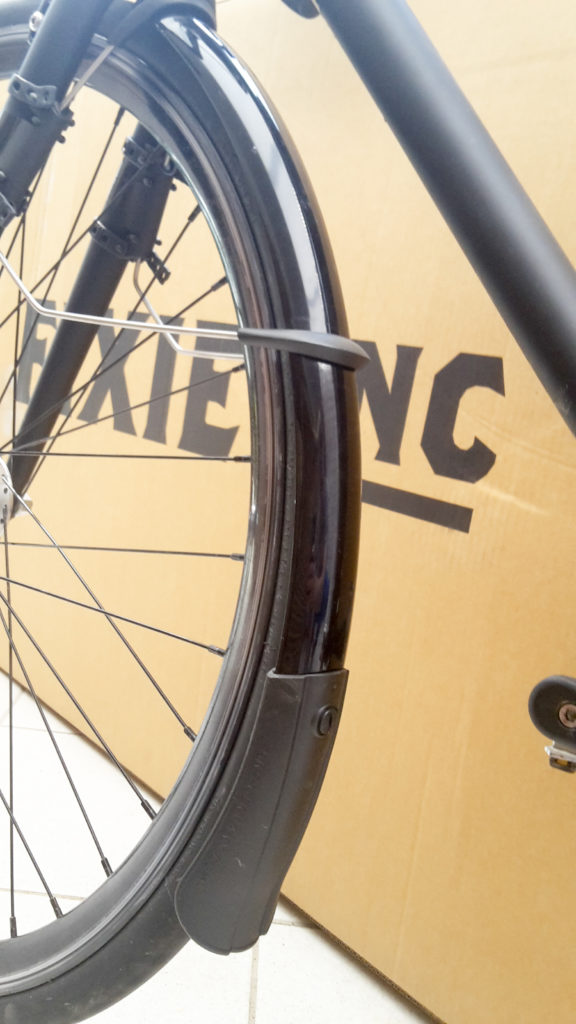
Schutzblech
Bei der Pendelei lässt sich auch schlechtes Wetter nicht vermeiden. Regen ist dabei zum einen unangenehm, zum anderen verschmutzt das Rad auch deutlich schneller. Daher habe ich am Floater Schutzbleche der Firma ZZZ angebracht. Zu beachten ist hierbei, dass die normalen Race nicht passen, da diese zu eng bauen. Man benötigt vielmehr Race XXL. Am Vorderrad muss man etwas tricksen um das Schutzblech fest zu montieren, mit einem Stück der Gummihalterung unter der Halterung aber kein Problem.
Die Schutzbläche können auch noch mit Folie beklebt werden.
Langzeittauglichkeit
Bisher habe ich mit dem Fixie Inc Floater ca. 500 km gefahren, mir sind dabei noch keine größeren Mängel aufgefallen, geplant sind dieses Jahr noch mehrere Tausend Kilometer, ich denke in einem halben Jahr sollten mehr Erfahrungswerte vorliegen.
Preis
Im bisherigen wurde noch nicht über den Preis des Rades gesprochen, zum Zeitpunkt des Artikels ist das Rad für 369 Euro erhältlich.
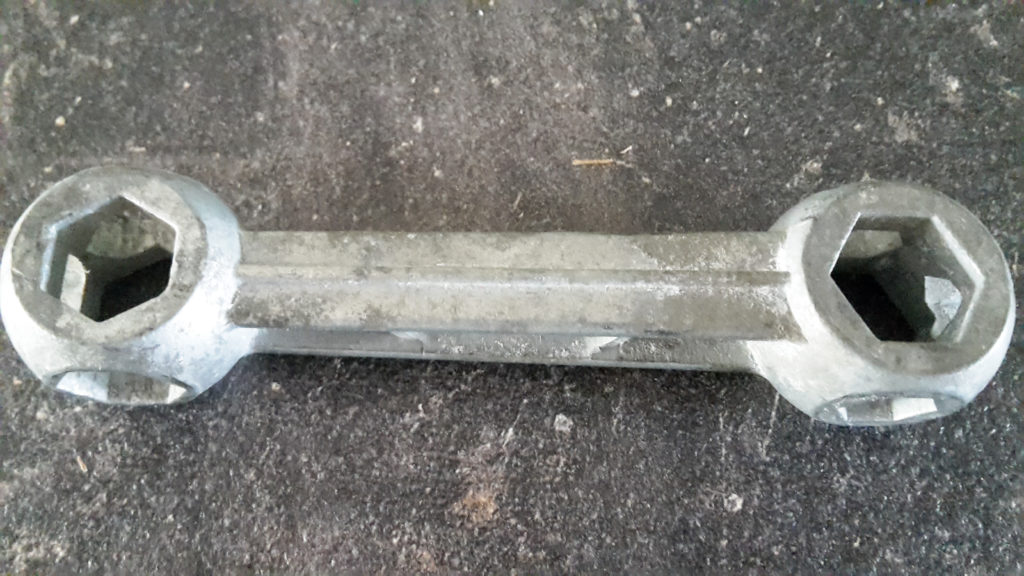
Werkzeug
Ich empfehle den guten alten Knochen in das Werkzeugsortiment, welches beim radeln mitgeführt wird, aufzunehmen. Sollte mal ein Reifen platt sein oder die Kettenspannung nicht stimmen, kann man damit die nötigen Schrauben lösen.
[03/26/16 01:32PM][runEyeFi] - Eye-Fi server started listening on port 59278
tcp 0 0 0.0.0.0:59278 0.0.0.0:* LISTEN 873/python
Seems okay
Upload Key
The first issue was the upload key.
Connected two different eyefi cards with OSX and Windows 7 and was unable to find an upload key other then 00000000000000000000000000000000
sqlite3 offline.db
SQLite version
Enter ".help" for usage hints.
sqlite> SELECT o_mac_address, o_upload_key FROM o_devices;
00-11-11-11-11-11|12345678901234567890123456789012
Hm but still, using that upload key (was reducted) the eyefiserver2 did not work.
And I was unable to get a connection from my camera to my pi.
On Apple OSX the following issue is very bad to solve:
Crashed Thread:        23  -[DeliveryQueue _deliverQueuedMessages:]  Dispatch queue: NSOperationQueue 0x7fcf5eb248f0 :: NSOperation 0x7fcf62396ec0 (QOS: UTILITY)

Exception Type:        EXC_CRASH (SIGABRT)
Exception Codes:       0x0000000000000000, 0x0000000000000000
Exception Note:        EXC_CORPSE_NOTIFY

Application Specific Information:
*** Terminating app due to uncaught exception 'NSInternalInconsistencyException', reason: 'Encoding a malformed address (unbalanced quote or parenthesis), bad things may be about to happen.
"XYZ,'
abort() called
terminating with uncaught exception of type NSException
There are some articles how to potentially solve it with deleting settings of mail etc. but there is another solution:
– Turn the system to offline mode (turn of WiFi etc.)
– Open Mail
– Search for the email with malformated content
– delete the email
– close Mail
– Turn the system back to online mode
– start Mail again
I have written about ddrescue in an article before, but just mentioned it without explaining how to use it.
As I had to use it again this weekend, here is how things go:
Install ports
1. Go to:https://www.macports.org/install.php and download your ports version of choice.
2. reboot
3. sudo port -v selfupdate
Install ddrescue
sudo port install ddrescue
This can even go without xcode:
Warning: xcodebuild exists but failed to execute
Warning: Xcode does not appear to be installed; most ports will likely fail to build.
Test installation:
ddrescue --help
GNU ddrescue - Data recovery tool.
Copies data from one file or block device to another,
trying to rescue the good parts first in case of read errors.

Usage: ddrescue [options] infile outfile [mapfile]

Always use a mapfile unless you know you won't need it. Without a
mapfile, ddrescue can't resume a rescue, only reinitiate it.
NOTE: In versions of ddrescue prior to 1.20 the mapfile was called
'logfile'. The format is the same; only the name has changed.

If you reboot, check the device names before restarting ddrescue.
Do not use options '-F' or '-G' without reading the manual first.

Options:
  -h, --help                     display this help and exit
  -V, --version                  output version information and exit
  -a, --min-read-rate=    minimum read rate of good areas in bytes/s
  -A, --try-again                mark non-trimmed, non-scraped as non-tried
  -b, --sector-size=      sector size of input device [default 512]
  -B, --binary-prefixes          show binary multipliers in numbers [SI]
  -c, --cluster-size=   sectors to copy at a time [128]
  -C, --complete-only            do not read new data beyond mapfile limits
  -d, --idirect                  use direct disc access for input file
  -D, --odirect                  use direct disc access for output file
  -e, --max-errors=[+]        maximum number of [new] error areas allowed
  -E, --max-error-rate=   maximum allowed rate of read errors per second
  -f, --force                    overwrite output device or partition
  -F, --fill-mode=        fill blocks of given types with data (?*/-+l)
  -G, --generate-mode            generate approximate mapfile from partial copy
  -H, --test-mode=         set map of good/bad blocks from given mapfile
  -i, --input-position=   starting position of domain in input file [0]
  -I, --verify-input-size        verify input file size with size in mapfile
  -J, --verify-on-error          reread latest good sector after every error
  -K, --skip-size=[,]  initial size to skip on read error [64 KiB]
  -L, --loose-domain             accept an incomplete domain mapfile
  -m, --domain-mapfile=    restrict domain to finished blocks in file
  -M, --retrim                   mark all failed blocks as non-trimmed
  -n, --no-scrape                skip the scraping phase
  -N, --no-trim                  skip the trimming phase
  -o, --output-position=  starting position in output file [ipos]
  -O, --reopen-on-error          reopen input file after every read error
  -p, --preallocate              preallocate space on disc for output file
  -P, --data-preview[=]   show some lines of the latest data read [3]
  -q, --quiet                    suppress all messages
  -r, --retry-passes=         exit after  retry passes (-1=infinity) [0]
  -R, --reverse                  reverse the direction of all passes
  -s, --size=             maximum size of input data to be copied
  -S, --sparse                   use sparse writes for output file
  -t, --truncate                 truncate output file to zero size
  -T, --timeout=       maximum time since last successful read
  -u, --unidirectional           run all passes in the same direction
  -v, --verbose                  be verbose (a 2nd -v gives more)
  -w, --ignore-write-errors      make fill mode ignore write errors
  -x, --extend-outfile=   extend outfile size to be at least this long
  -X, --exit-on-error            exit after the first read error
  -y, --synchronous              use synchronous writes for output file
  -1, --log-rates=         log rates and error sizes in file
  -2, --log-reads=         log all read operations in file
      --ask                      ask for confirmation before starting the copy
      --cpass=[,]          select what copying pass(es) to run
      --max-read-rate=    maximum read rate in bytes/s
      --pause=         time to wait between passes [0]
Numbers may be in decimal, hexadecimal or octal, and may be followed by a
multiplier: s = sectors, k = 1000, Ki = 1024, M = 10^6, Mi = 2^20, etc...
Time intervals have the format 1[.5][smhd] or 1/2[smhd].

Exit status: 0 for a normal exit, 1 for environmental problems (file
not found, invalid flags, I/O errors, etc), 2 to indicate a corrupt or
invalid input file, 3 for an internal consistency error (eg, bug) which
caused ddrescue to panic.

Report bugs to bug-ddrescue@gnu.org
Ddrescue home page: http://www.gnu.org/software/ddrescue/ddrescue.html
General help using GNU software: http://www.gnu.org/gethelp
Find the right disk
diskutil list
Start ddrescue
sudo ddrescue -v /dev/disk3s2 /Volumes/backup/failing_drive_backup.dmg failing_drive_backup.log
GNU ddrescue 1.20
About to copy an unknown number of Bytes from /dev/disk3s2 to /Volumes/backup/failing_drive_backup.dmg.
    Starting positions: infile = 0 B,  outfile = 0 B
    Copy block size: 128 sectors       Initial skip size: 128 sectors
Sector size: 512 Bytes

Press Ctrl-C to interrupt
rescued:     7621 MB,   errsize:         0 B,    current rate:  10878 kB/s
   ipos:     7621 MB,    errors:         0,      average rate:  10484 kB/s
   opos:     7621 MB,  run time:      12m 7s,  remaining time:         n/a
time since last successful read:          0s
Faster
Found an good recommendation from Christian Schwang:
– instead of /dev/disk{x} you may use /dev/rdisk{x} – This will give a massive performance boost (in my testing transfer rate went from 30 MB to 130 MB). For detailed reason you may want to look at: http://lists.apple.com/archives/filesystem-dev/2012/Feb/msg00015.html
Result with the same drive as above:
sudo ddrescue -v /dev/rdisk3s2 /Volumes/backup/failing_drive_backup2.dmg failing_drive_backup2.log
Password:
GNU ddrescue 1.20
About to copy an unknown number of Bytes from /dev/rdisk3s2 to /Volumes/backup/failing_drive_backup2.dmg.
    Starting positions: infile = 0 B,  outfile = 0 B
    Copy block size: 128 sectors       Initial skip size: 128 sectors
Sector size: 512 Bytes

Press Ctrl-C to interrupt
rescued:     5215 MB,   errsize:         0 B,    current rate:  34209 kB/s
   ipos:     5215 MB,    errors:         0,      average rate:  33649 kB/s
   opos:     5215 MB,  run time:      2m 35s,  remaining time:         n/a
time since last successful read:          0s
Known issues
drescue: Can't open input file: Resource busy
Solution: Open the DiskUtility.app, and on your to-be-recued-drive, unmount any of it’s partitions.
Warning: Do not eject the USB hard drive.
If you are using the Amazon Music App to access your Amazon prime music library from your Android device, it will display all mp3s found on the device. That might be odd if you have audiobooks or ringtones that you do not want ot be in your playlist.
The solution to ignore folder is to create an empty file with the name:
.nomedia
And place it into the folder you want to be ignored, refresh your media library in the App and all the folders will be ignored.
How cool is that, riding several hundret kilometers every week including areas with people walking around it annoyes to ring a bell.
Found myself angry with people, dogs, kids etc not recognizing my bell.
SwissTrailBell simply solves a problem that no one ever considered to be important enough to be solved.
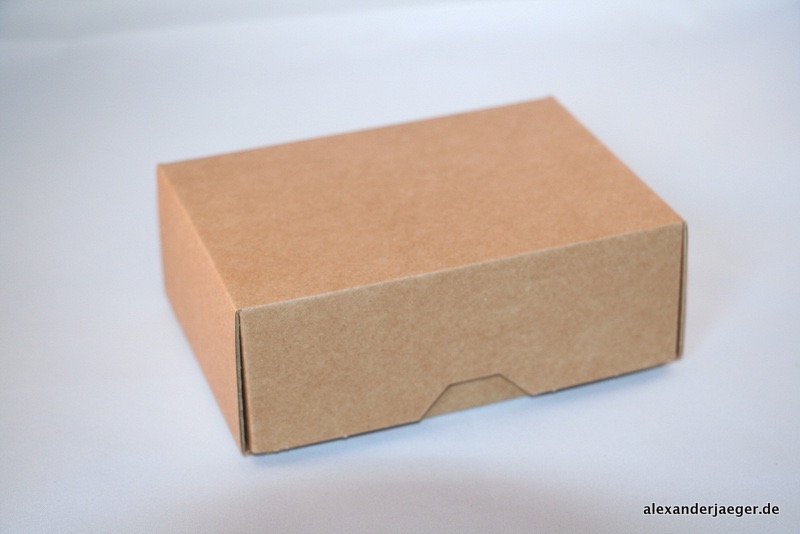
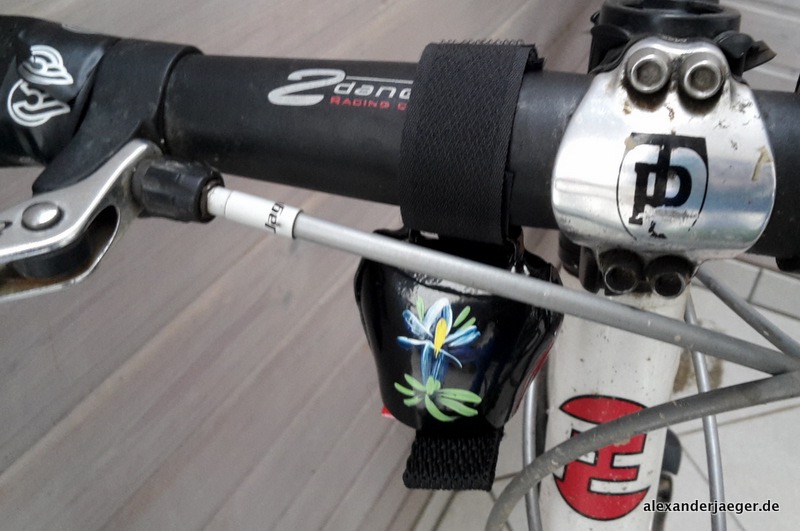
Unboxing
The swisstrailbell is delivered in a unlabeled brown carton.
Swisstrail bell box
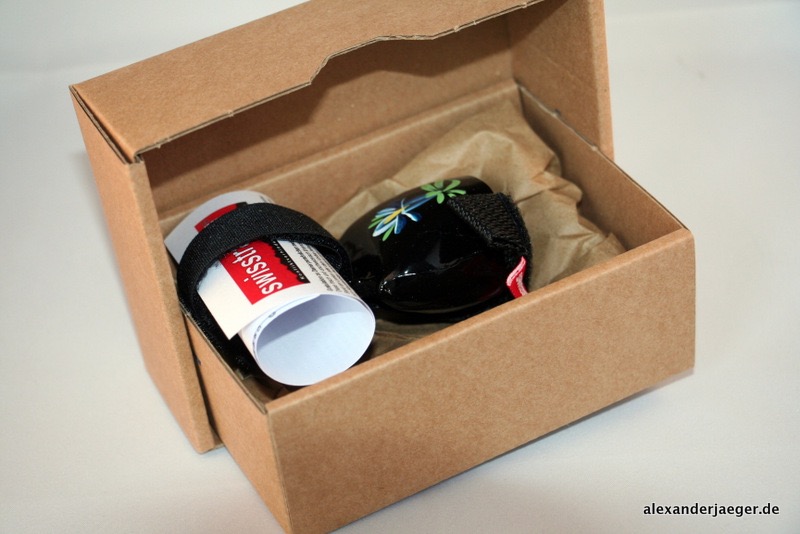
Within that box is the swisstrailbell itself and a short howto in german only.
Swisstrailbell box 2
Swisstrailbell box 3
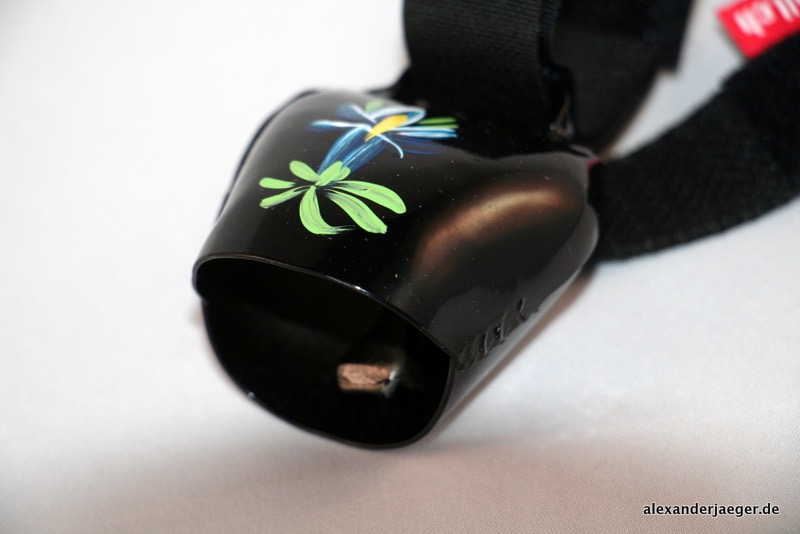
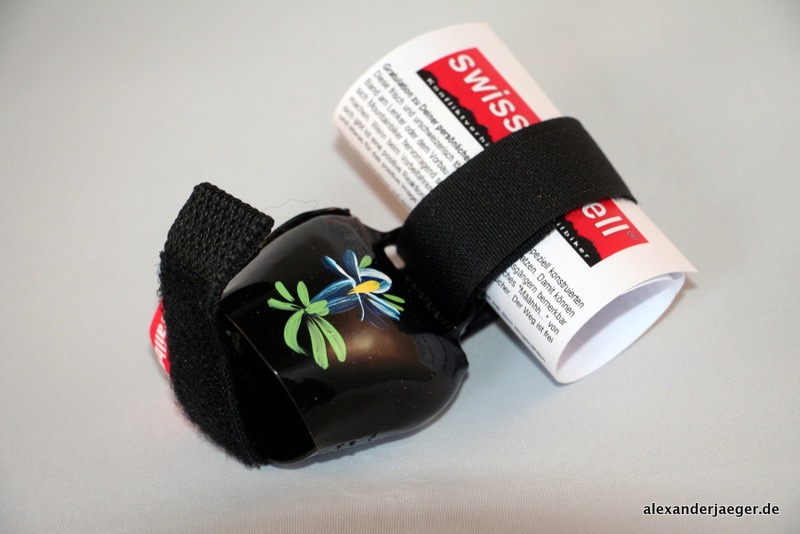
The swisstrailbell itself is black and nicely made.
Swisstrailbell
Swisstrailbell
(The bell was ordered via Fahrradklingel-shop, so other shops might change the boxing)
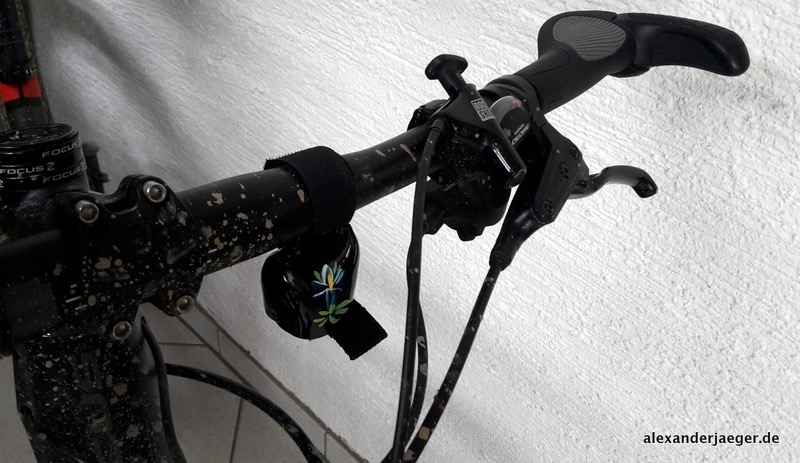
Installation
Very easy and straight forward.
Swisstrailbell on a Cyclocross bike
Swisstrailbell on a MTB
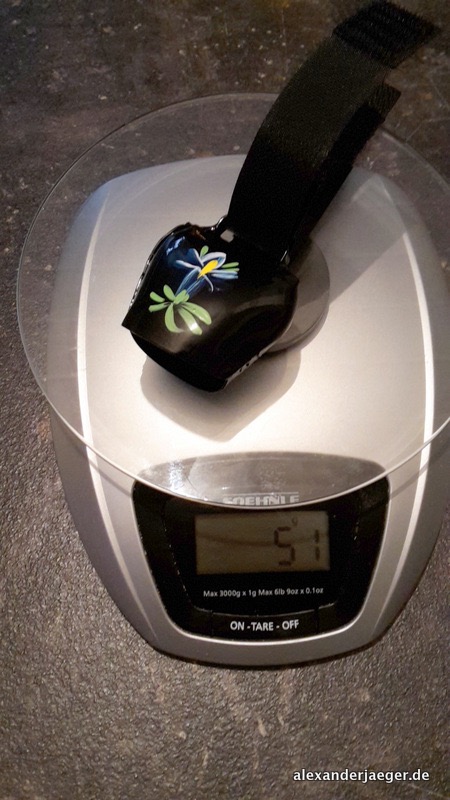
Weight
Swisstrailbell weight
The ordered version is exactly 51 g.
Volume / sound
HOW LOUD IS IT? Loud enough!
In regards to the sound, fahrradklingel-shop.de has recorded an mp3 which gives an good idea about the sound.
Usage
I got one a week ago, attached it to my road bike and tried it several times and it just rocks.
It is loud enough to warn people early, they do not over-react and it sounds nicely. It is made for off-roaders riding trails to keep the hands on the handlebar while still informing people.
Very easy to attach to nearly every bike, of course mountain bike but also road and time trial bike can be used with the swisstrailbell.
And last but not least – the swisstrailbell is beatiful, it is an eye-catcher on every bike and envious eyes are guaranteed.
Pro:
+ Ringing by itself
+ Signaled by constant ringing audibly convergence
+ High acceptance by pedestrians
+ Different colors / designs
+ Easily activated with one hand
+ Simple assembly / disassembly
+ one per group is enough
Contra:
– relatively expensive
– can by itself twisting or slipping
– on duration annoying tinkling
– the design is a matter of taste
– relatively high weight
The swisstrailbell is about 28 € and can be ordered via swisstrailbell.ch
Alternatives
If the design of the swisstrailbell is not your style, found some alternatives on Amazon (so called Bären Glocke, bear bell):
Die Fahrrad Fotographie ist Teil der Produktfotografie und kann insbesondere den Verkauf von Fahrrädern befördern. Neben einem Foto vom Fahrrad als ganzes sollten auch Details wie Kurbel, Schaltung, Bremse, Bremsflanken und weitere Besonderheiten, aber bei gebrauchten Rädern auch Schönheitsfehler wie Kratzer, Dellen oder Unschönheiten abgelichtet werden.
Wer sein Fahrrad verkaufen möchte, sollte dies mit einem bzw. mehreren ansprechenden Fotos zeigen können.
Um das Fahrrad möglich schon zu fotografieren, gibt es ein paar einfache „Fahrrad Foto Regeln„.
– Fahrrad putzen
– Dinge, die nicht verkauft werden sollen – demontieren
– Fahrrad vor gleichmäßigem, ruhigen, einfarbigen Hintergrund ablichten
– Fahrrad von rechts (Kettenseite) fotografieren
– für das Foto auf die richtige Höhe gehen (Blickwinkel!)
– Kurbel auf ca. 3 Uhr stellen
– Kette rechts (größtes Kettenblatt + größtes Ritzel)
Mit diesen einfachen Hinweisen sollte dem ansehnlichen Bild nichts im Wege stehen, sei es Mountain Bike, Rennrad, Cross Fahrrad, Zeitfahrrad, Triathlon Rad, Fixie oder weitere Bauart.


 Reflektoren